How to Make a Papier-Mache Piggy Bank Pinata

This piggy bank pinata is super easy to make. Once assembled, decorate it with tissue paper or use only paint for a more authentic piggy bank look.
Mini piggy banks can also be made to be used as party favors to complement this cute pinata.
Materials
To make the piggy
- 16-inch balloon
- Flour
- Printer paper
- Paper trimmer (optional)
- Water
- Whisk
- Two large mixing bowls
- Scissors
- Download the Piggy bank pinata template
- Masking tape
- Pencil
- Ruler
- Craft knife
- 28-inch rope
- Bath towel for the mess
For decor
- Craft paint in assorted colors
- Stencils (optional)
- Paintbrushes
Prepare
To begin, cover the area you will be working on with a towel, it will get messy.
Next, Inflate the balloon.
Then, cut sheets of paper into 2 x 5 1/2 inch strips. I use small thin pieces of paper because they are easier to attach. Use about 20-30 sheets of paper per layer. I recommend using a paper trimmer; you will save a lot of time.
Most people use newspaper to make paper mache pinatas, If you have that available, go ahead and use that instead of printer paper. We stopped our newspaper subscription many years ago, so I have been using printer paper to make my pinatas. It started as a last minute solution one day when I ran out of newspaper, but now I love using white paper because I like the white canvas I end up with, it is easy to cover and draw on.  After that, grab one of the large mixing bowls and whisk together 2 cups of water 1 cup of flour. By the way, this mixture goes a long way. Use a 2 part water 1 part flour ratio for every layer.
Begin
Next, Place the balloon on a large mixing bowl to prevent from rolling around.
Then, dip one strip of paper at a time and run thru fingers to remove as much of the flour mixture as you can. Above all the paper should be wet but not soaking wet. 
Continue to overlap the strips of paper until all the balloon gets covered.
Leave a small space uncovered to remove the balloon at the end.
Allow time to dry.
Second layer
In the meantime, Download and Print the piggy bank pinata template. I used regular printer paper, but you can print it on cardstock to make the legs more sturdy.
Cut the partial circles and fold into cones. Use the masking tape to secure the cones and attach them to the piggy.
Attach the front legs about 2 inches from each other and the back legs about 4 inches from the front legs. Flip the piggy to make sure it doesn’t wobble.  Make more flour mixture and add another layer of paper mache to the piggy.
Be very gentle when adding the paper to the leg area. Add extra layers on the bottom for support.
Let it dry. 
Finishing touches
Once the piggy is dry, flip it on its legs and remove the balloon. Cut a small incision and let the air out slowly.
Next, attach the ears with masking tape. Cover the ears with paper mache and add another layer of paper mache to the whole piggy. Add extra pieces to the top, bottom, and snout. Let it dry.
You can stop here or continue to add as many layers as you want. There are three layers of paper mache on this piggy. You want this pinata to break, so don’t go too crazy with too many layers.
Draw a rectangle on the side near the top and cut sides and bottom with the craft knife. The opening should be big enough to fit bigger pieces of candy and for your hand to fit in. 
To attach the handle, draw two small x’s at the top about 4 inches from each other and cut with craft knife. Press down and insert the rope. Reach inside and pull out to make a double knot. Repeat the same step for the other hole. 
Time to Decorate
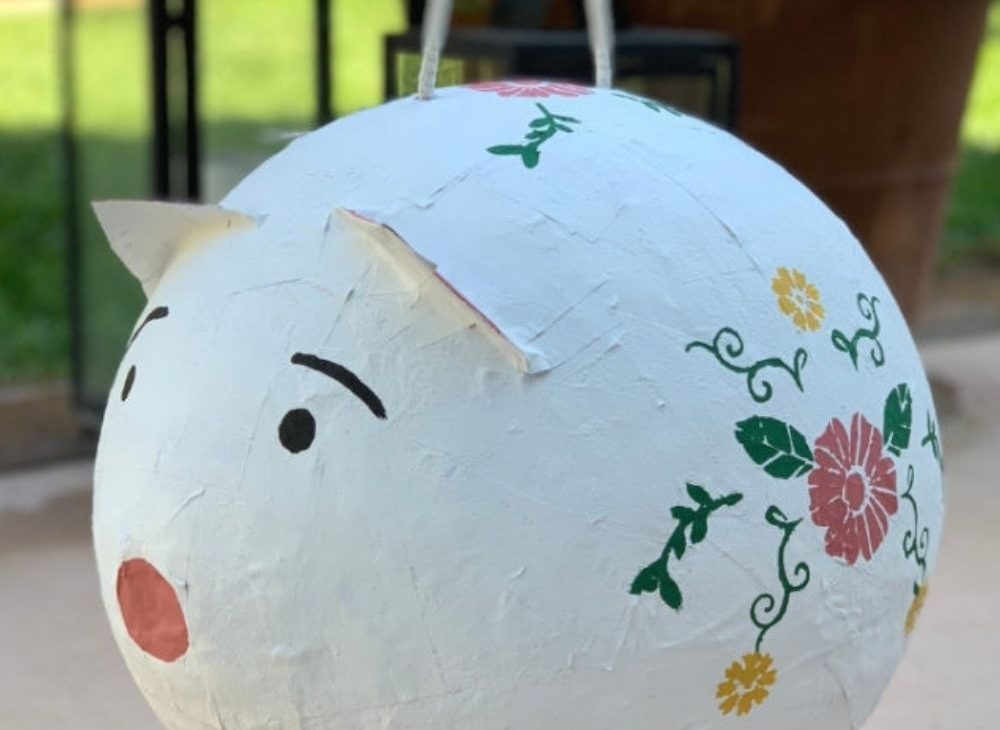
Finally, this piggy is ready to decorate. Paint white or any color you prefer.
Use stencils or freehand your design to add color.
Draw a face on the piggy and a cute tail. 
Fill with candy, toys, confetti or the filler of your choice.
The pinata is finally ready. Have a pinata stick ready.


