How to Make a Star Piñata with Seven Points
If you are familiar with posadas then, you know that a star piñata with seven points is a must-have for your posada party. The seven points represent the seven deadly sins one must overcome. However, unless you are in Mexico, this type of piñata is a little hard to find. So, here is a detailed tutorial for making your very own.
Star Piñata Base
Materials
- 16 in balloon
- Flour
- Water
- Pinter paper
- Two large mixing bowls
- 28-inch rope
When I was little, the base of the piñata was made out of clay! ouch. I remember being a bit scared of the clay pot falling on my head, but I wanted the candy, so I went for it anyway. Luckily, the pinatas nowadays are made of cardboard or paper mâché, so the only thing you have to avoid is getting whacked with the piñata stick. lol
First, inflate the balloon and place over one of the large mixing bowls, this will keep it in place while you work.
Next, cut the printer paper into 2-inch by 8-inch strips. I like to use printer paper, but you can use newspaper as well. Each layer will need about 20 sheets of paper.
Then, mix 1 cup of flour and 2 cups of water. Whisk together until all the lumps have dissolved. Use a 2:1 ratio for the mixture.

Now, dip a strip of paper into the flour mixture and run between your fingers to remove as much of the liquid.

Place the strip on the balloon and repeat this step until the entire surface gets covered. But, leave a small area uncovered to remove the balloon later.
Allow each layer to dry a bit and then continue to add as many layers as you would like. For little
Rotate the balloon as it dries.
Remove the balloon once all the layers of are dry and cover the area with paper mache.

Tassels
Materials
- Tape
- Gold shreds
Begin by placing a large piece of tape between your fingers.
Then, grab a handful of shred and place it on the tape. Don’t worry if it’s not perfectly aligned. Fold the tape to form a tassel and repeat 14 times.
Each cone will have 2 tassels.

Seven Cones
Materials
- 7 – 12″ x 12″ Cardstock sheets
- Scissors
- Stapler
First, twist each sheet of cardstock into a cone and secure with a few staples at the bottom. Make sure all cones are the same size and leave a small gap at the tip to insert the tassels later.
Next, Cut the excess triangle at the bottom to form a cone.
Then, use scissors to form tabs at the bottom. \ / \ /

Insert the tassels into the tip of the cone and secure them with a few staples.
Assemble
Figure out where the top of your pinata will be and attach the rope.
Use a craft knife to make two small cuts and push with the tip of a pencil to form a hole.
A few inches lower cut a door.

Insert the rope in a reach inside. Pull the rope out and make a few knots. Repeat for the other side to form a handle.

Use a hot glue gun to attach the cones to the piñata. Five around and two on the sides. Congrats, now you have a seven-point star pinata.

Decorate
Materials
- Hot glue gun
- Glue Sticks
- 30 FT
- Tinsel Garland
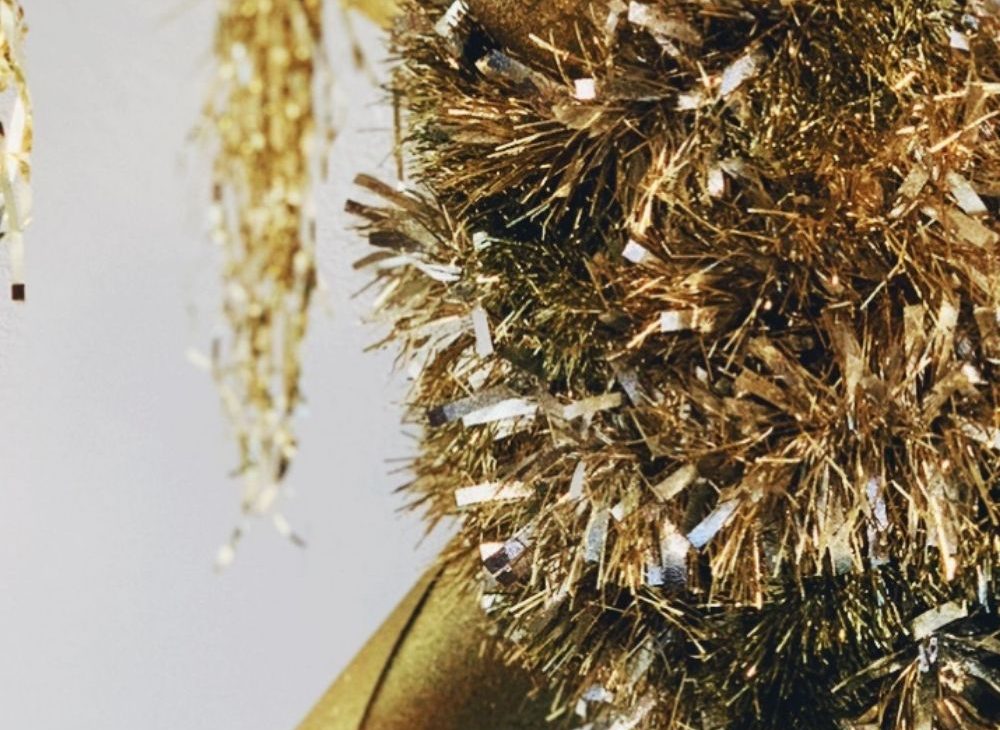
Finally, the fun part begins.
Spread hot glue on each cone and wrap with the tinsel garland. The garland you see in the pictures is from Target, you can use any color you like. I already have my eyes on a colorful garland for next year’s piñata.

Once all the 7 cones are wrapped, repeat this step and wrap them all again. Follow this technique until the entire Pinata is covered.
Use any extra tinsel to cover any patches you might have missed.

Decorate a wooden stick to match the piñata, make sure is strong enough to take a hit
During the posadas, the piñata traditional gets filled with small oranges, sugar cane sticks, roasted peanuts and of course, candy.
I had fun making this piñata, and I am glad I get to share it with you. I hope you enjoyed this tutorial. Here are more DIY ideas.