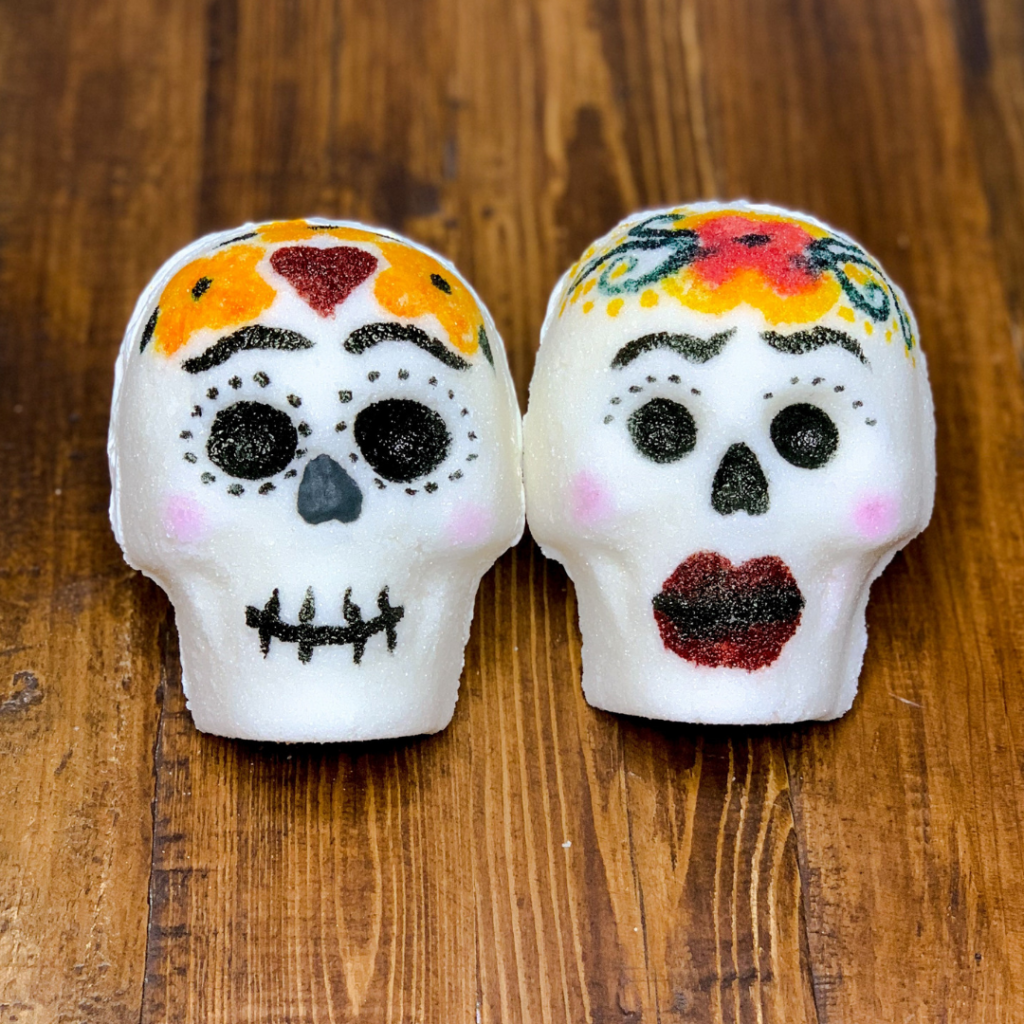
Sugar Skulls for Day of the Dead

If you are planning on celebrating Day of the dead, don’t skip out on making sugar skulls, they are easy to make and are an essential component of this beautiful celebration.
For years I wanted to make sugar skulls, but never found the right mold to make them. Finally this year I found the perfect mold, and It worked great. I am very excited to share my way of making them with you.
This recipe yields 3-4 full skulls.
Materials
For the skull
- Sugar skull Mold, this mold has two components to make a full sugar skull.
- 8 cups of granulated sugar
- 1/4 cup of meringue powder
- 1/2 cold water
- Large mixing bowl
- Hand mixer
- Wooden Spoon
- Small spoon
- Banking sheet
- Parchment paper cut to 5 x 6-inches
- White Royal icing
- Plastic Piping bags
- Decorating Piping Tips
For Decorating
- Gel food colors
- Decorating dust
- Paint Brushes
- Royal icing (optional)
- Piping bags (optional)
- Metal decorating piping tips (optional)
- Glitter or metallic paper
Using the Sugar Skull Mold
Set oven temperature to 200-degree Fahrenheit.
Begin by Combining meringue powder and the cold water, mix until it forms high peaks.

Next, add the granulated sugar and mix with a wooden spoon until you have a thick paste.
Starting with the face mold. Add sugar mixture into the mold and press down with the back of the wooden spoon to remove any air bubbles and scrape any excess sugar.
Then, using a small spoon, hollow out a circle in the skull and return the excess sugar to the mixing bowl.

Flip the mold into a parchment paper and place it on the cookie sheet.
Fill back mold the same way and hollow out a circle in the middle, return any excess sugar to the mixing bowl.
Repeat all the steps until you have used all the sugar mixture and have made 3 – 4 sugar skulls.
Then, place the cookie sheet in the oven for 30 minutes.
In the meantime, make your favorite royal icing recipe and have it ready in a piping bag to assemble your skulls.
Remove skulls from the oven and let them cool.
Once they are cooled, run your fingers along the edges to remove any uneven spots.
Assemble
To assemble run a strip of royal icing along the edge of the front part of the skull and attach the back of the skull to it.

After you join the two pieces, use your finger to smooth out any icing that came out.
Let them dry.
Decorating tips and ideas
Royal icing vs. Gel colors
I tried two ways of decorating the sugar skulls, I used Royal icing for one batch and painted with gel colors the second batch.
My piping skills need more practice, I found that painting with gel colors was way easier and more fun. So decide your preferred method or mix the two components to give your sugar skulls more detail.
For royal icing make sure your recipe is not too runny, once you begin decorating there is no easy way of removing the color, but you can always pipe over something to cover a mistake.

To paint, Dilute a few drops of color into a small container with a few drops of water, if you add too much water, your paint will run all over the skull. Repeat this step to make different colors, so your skull looks festive and beautiful. Use thin paint brushes to decorate the skull.

Special Touches
Also, there is no wrong way to decorate a sugar skull. You can also use glitter or metallic paper to decorate.
Finally, I found that using decorating coloring dust gave the skulls a fun look. I used pink as a blush, and they immediately looked much cuter.

Here are more Day of the Dead ideas.


