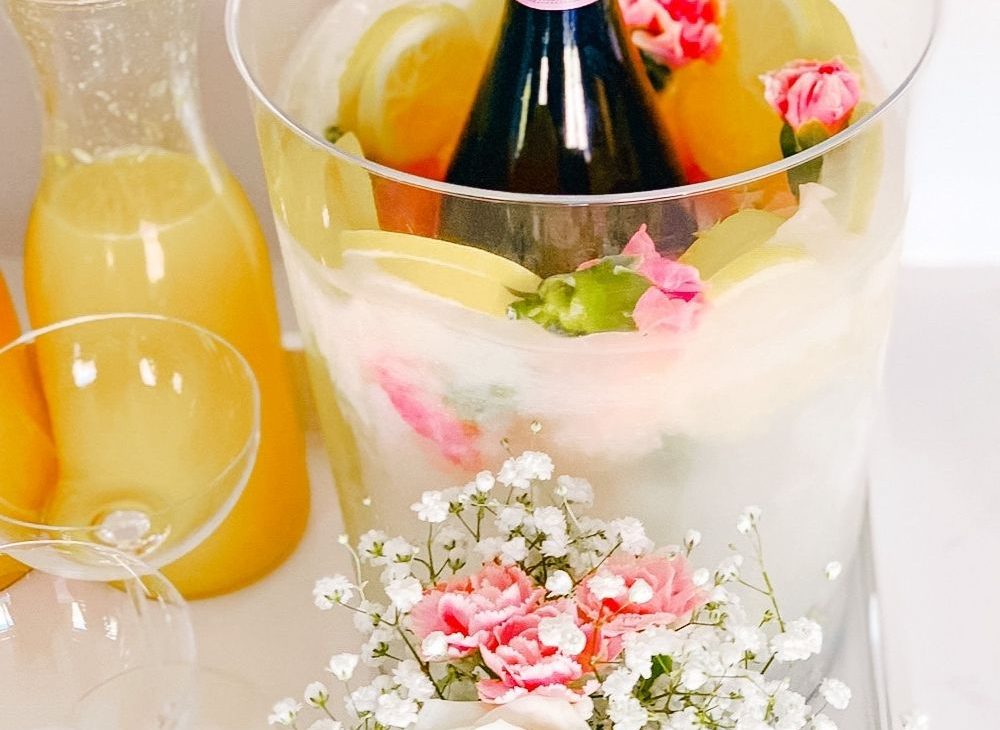
How to make Floral and Fruity Ice Buckets

If you are looking for party decorations that are beautiful and practical, look no further, these floral and fruity ice buckets are gorgeous and will keep wine and spirits chilled for a long time.
I recently had the honor to host a lovely Love You A Brunch! Party for my sister’s birthday. One of the first things I made and inspired the whole theme of the party was these Floral and fruity ice buckets.
Although they are very simple to make, they take a few days to set. Make a few days in advance; because they are worth it. Besides keeping your bottles chilled and looking beautiful, as the ice melts you begin to smell the citrus.
Here is how to make them;
Materials
- Clear bucket
- Wine bottle holder
- Rocks
- Water
- Fruit
- 2-3 lemons
- 2-3 limes
- 6 strawberries
- Flowers – one bouquet
- Silicon ice cubes (optional)
Instructions
First, Make some space in your freezer to store the bucket.
Next, wash the fruits and cut into rounds, halves, or wedges. Leave the strawberries whole or cut in half if they are too big. Any smaller berries leave as is or they will tint the water way too much.
Then, place the small wine bottle holder inside the large bucket and fill it with rocks to prevent it from floating. I use a metal bottle holder because that is what I have available. However, you can use any plastic or metal container that you own, but make sure your bottle of wine fits in it, and that it’s not glass. The large bucket I bought at Target.
Once the rocks are in place, fill the bucket with water about three-quarters of the way.

Now, place all the fruits and flowers in the water. Arrange them as best you can, but, don’t waste too much time trying to arrange them, because they will shift when you transfer them to the freezer.

When all the water is frozen, remove the ice bucket from the freezer and add hot water to the small wine bottle holder. At this point, you can remove the rocks before you dump the water and keep replacing it with more hot water until it slides out.
Finally, return the bucket back to the freezer until you are ready to use it. Chill champagne or vodka and enjoy!
Also, I should note, that by doing all the steps at once, a lot of the fruits and flowers will float to the top. I like the way this looks. However, you can get a more even look by freezing the fruits and flowers in two stages. By this I mean add water, fruits, and flowers to half of the bucket and freeze overnight. Once that is frozen add more water, fruits, and flowers and freeze again.
Floral and Fruity Ice cubes
Place any extra flowers or fruit in silicon ice cubes. Once they are ready, use them to top the beverage cooler or your drinks.
Tips
For our party, I made two buckets, and I was worried they would melt too quickly, that is why I left one inside the clear bucket and the other one I took out of the large bucket and placed it inside a large cooler filled with ice. Our party lasted about five hours, and by that time both buckets were still in great shape.

Another thing I like to point out is that using filtered water or tap water won’t make a difference in the clarity of the ice bucket, because the fruits will immediately cloud the water.
If you would like to remove the large bucket as well, then place a towel under it to catch all the ice that melts.
I hope you have enjoyed this fruity and floral ice buckets, It was fun making them, and I hope you get the chance to make them too.
Visit the drinks page for more ideas.


